Post-Visit Survey Settings
 Updated
Setting Up Post-Visit Surveys
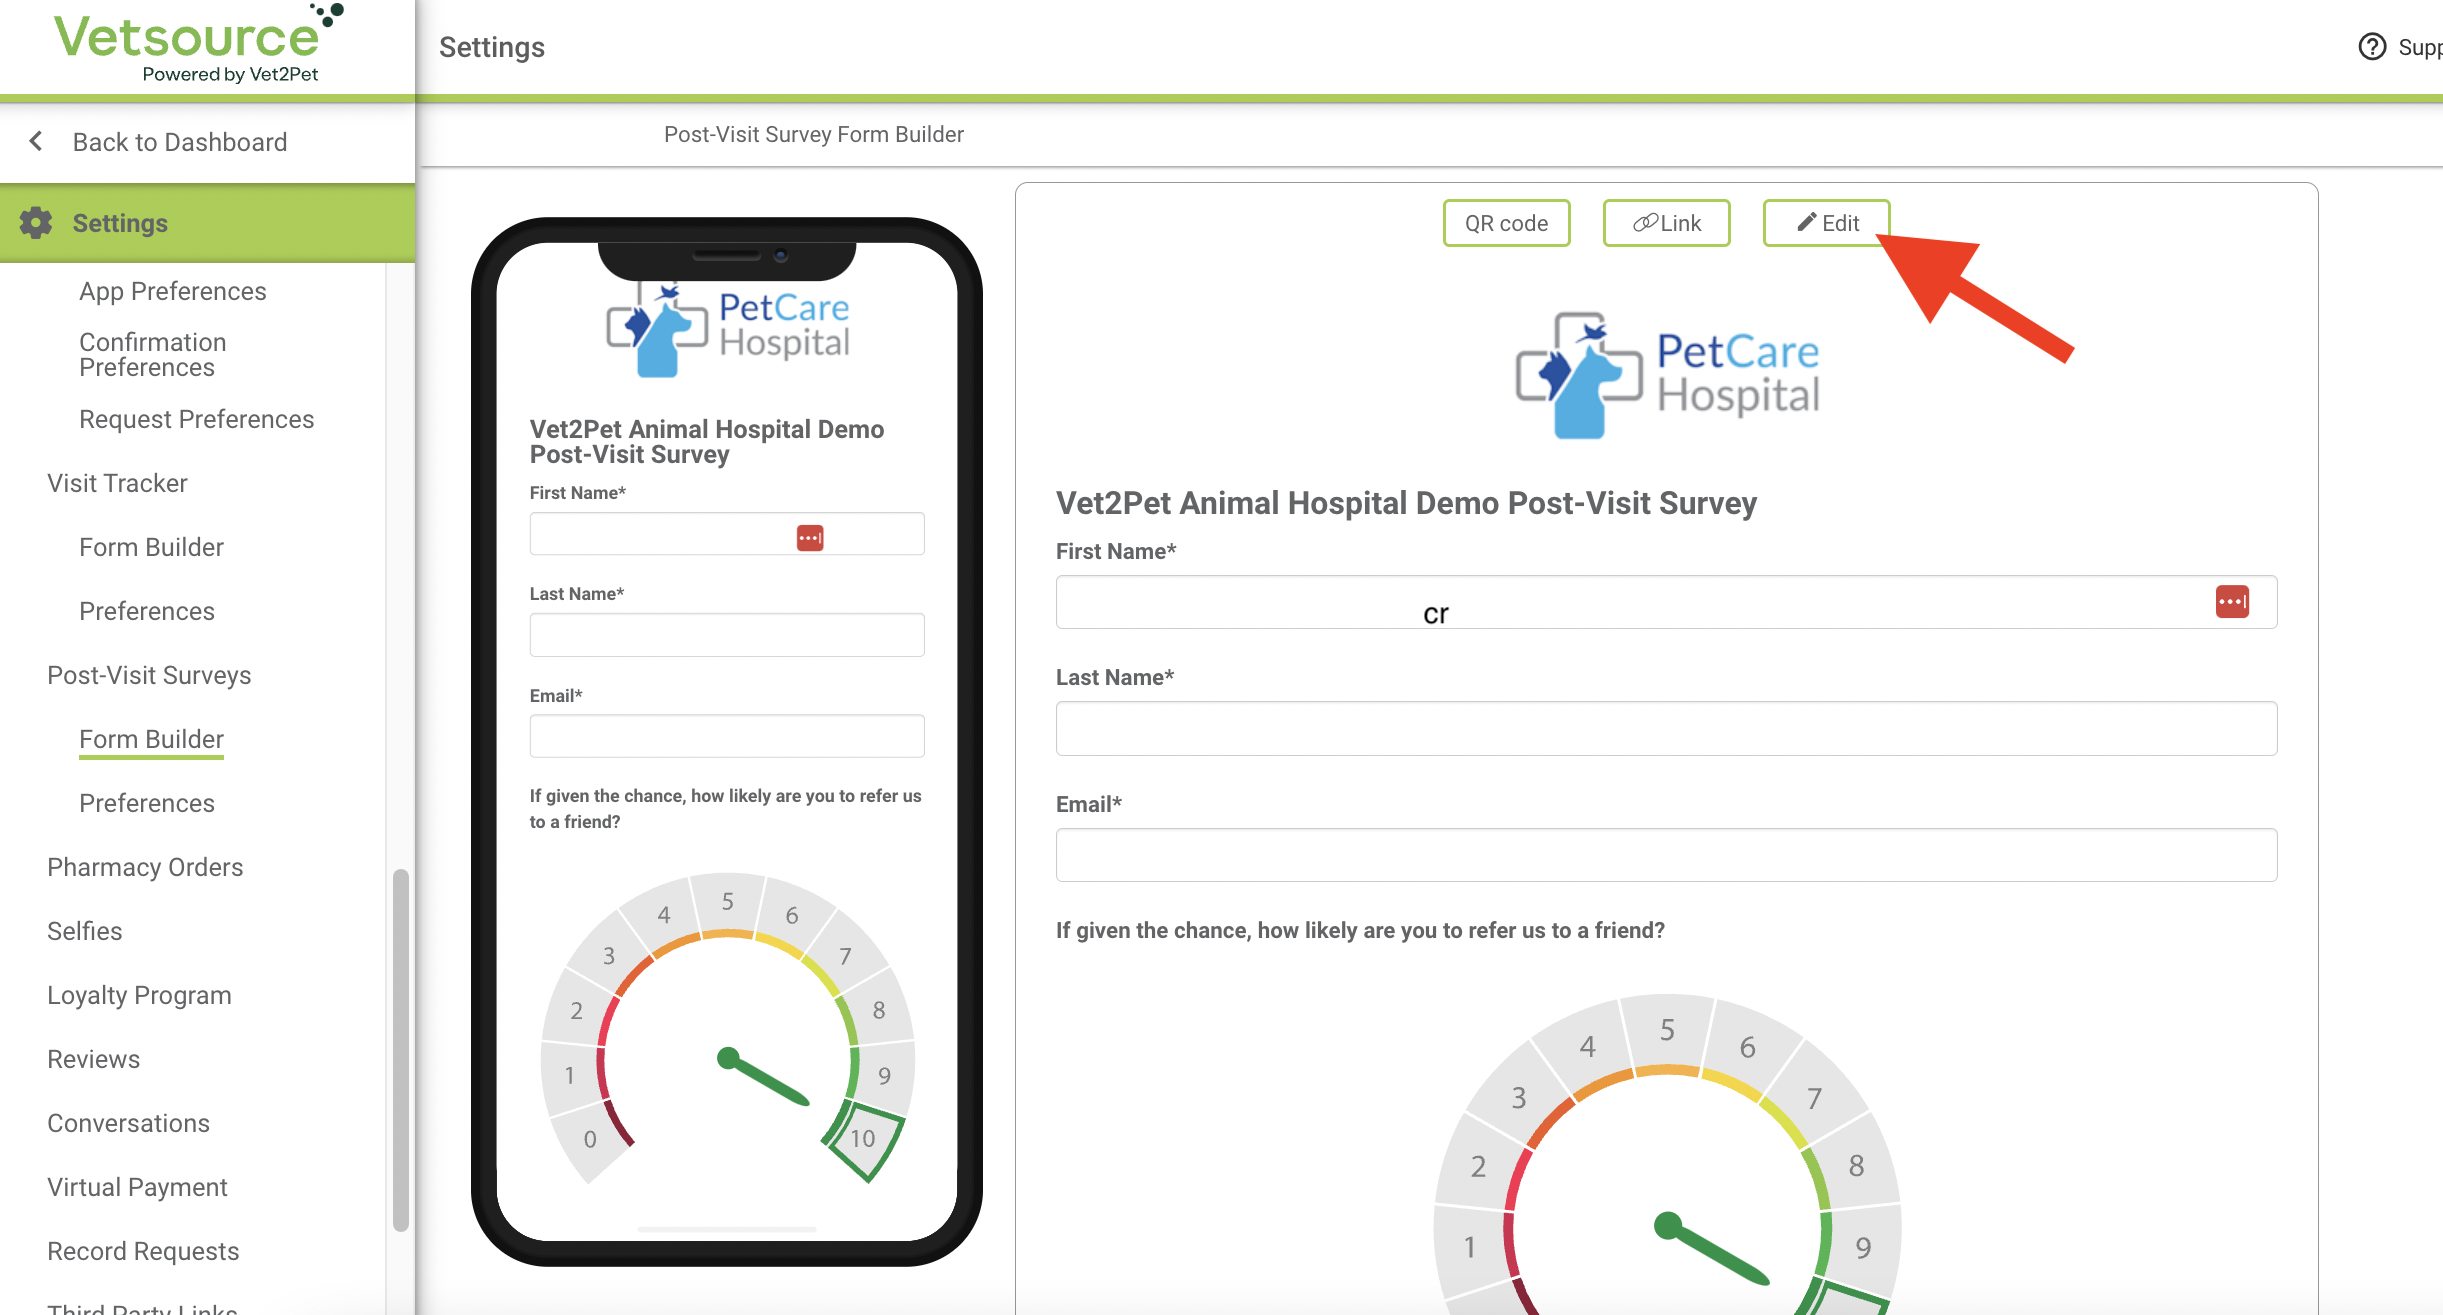
To create your customized survey form, go to Settings > Post-Visit Surveys > Form Builder.
The required questions are already included in the form and cannot be removed. To add additional form fields, click the Edit button and simply drag and drop the form field type in the right side column, update the text, and see a live preview of your form as your clients will see it on their mobile device. The form does not include logic for different scenarios.
Survey preferences:
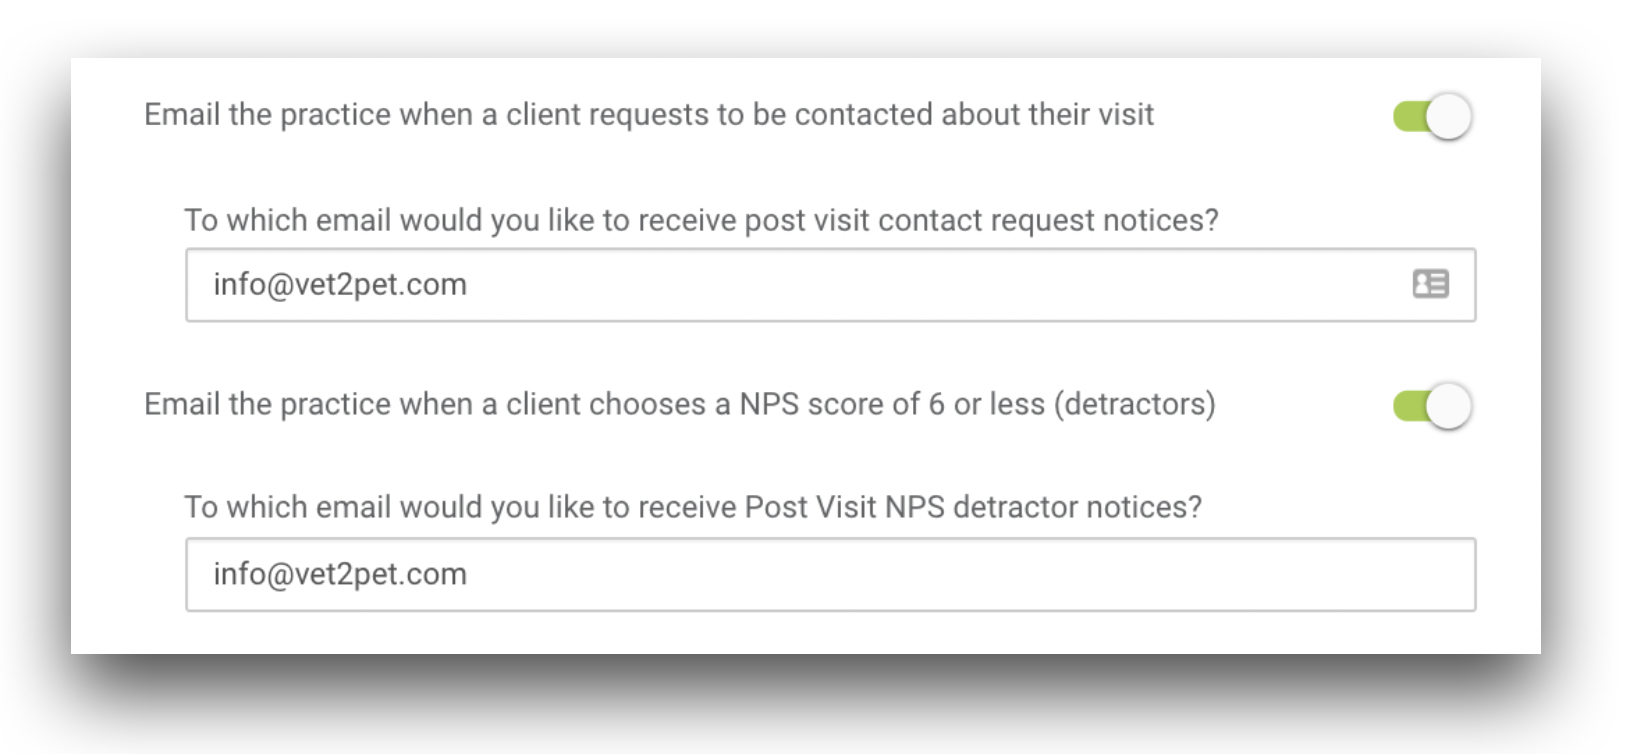
To receive an email when a client requests to be contacted about their visit, enable the switch to Email the practice when a client requests to be contacted about their visit.
To receive an email when a client chooses a detractor NPS rating of 6 or less, enable the switch to Email the practice when a client chooses a NPS score of 6 or less (detractors).
If either switch is enabled, the email will be sent to the address entered under Settings > Practice Info > Primary Email. To have the email notification sent to a different address, enter it in the space provided.
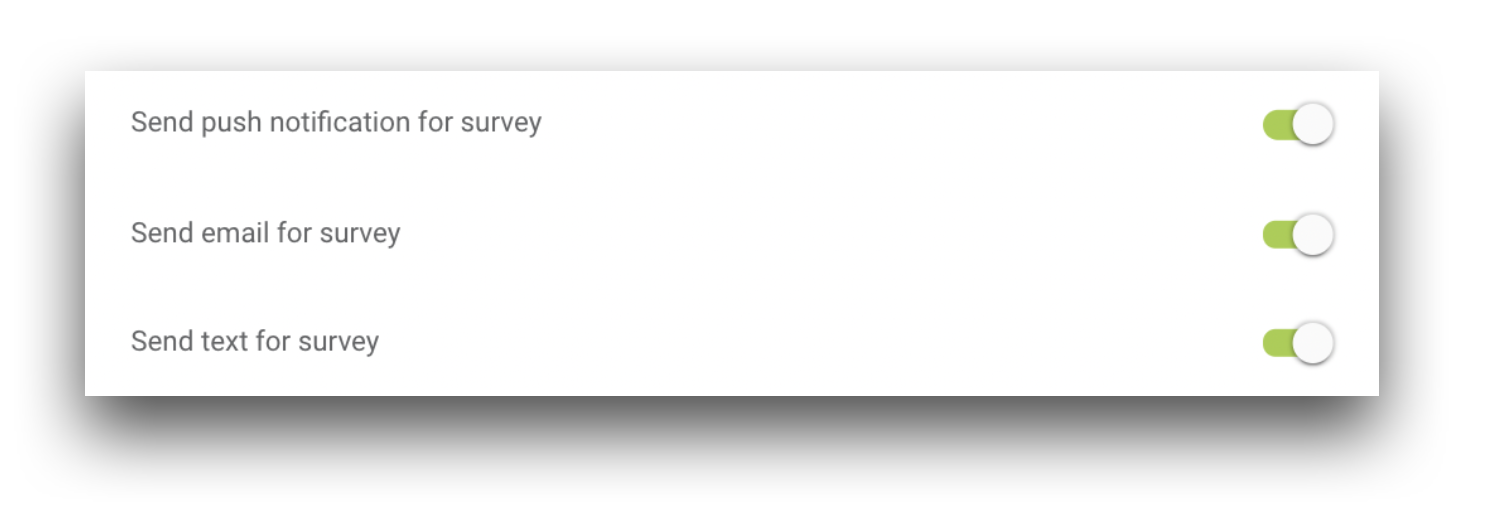
For the automatic sending method, surveys can be sent via email, push notification, and SMS text by enabling the associated switches. Some clients may receive the survey request from two or more channels.
Emails will be sent to clients with a valid email in your practice management software (PMS). Texts will be sent to clients with a textable phone number in your app dashboard, or in the primary phone number field in your PMS. Push notifications will be sent to clients who have downloaded and logged in to your mobile app, unless the client has disabled notifications in their device settings.
Push notifications and emails are branded with the practice's logo.
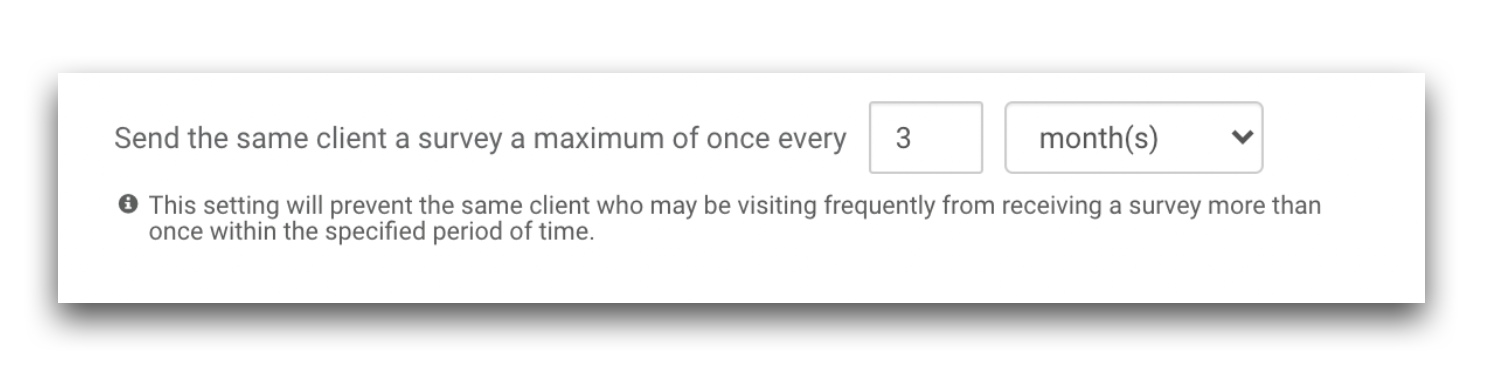
Your practice can specify how frequently to send survey requests, so you can avoid sending multiple requests to clients who visit frequently.
Survey triggers:
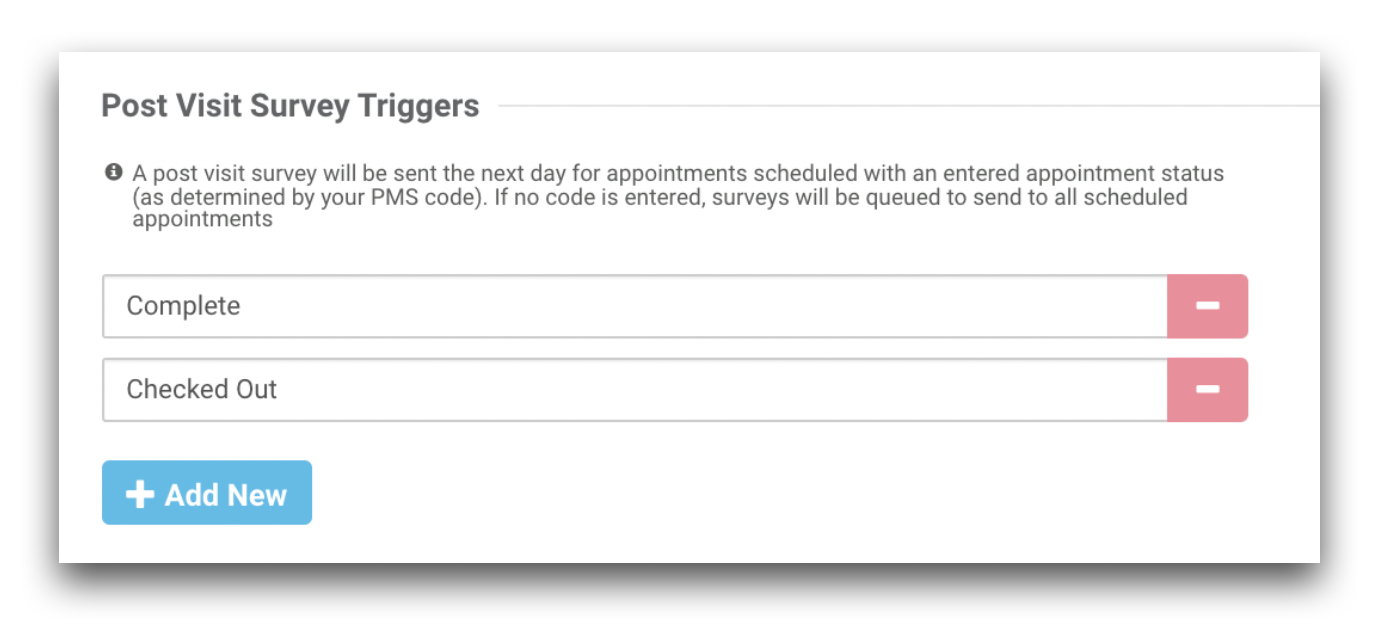
Your practice can define which PMS appointment statuses will trigger a post-visit survey by entering the appointment status code under Settings > Preferences > Post Visit Survey Triggers. To see a list of available status codes from the PMS, download the My Practice Appointment Codes report under Settings > Appointments > Confirmation Preferences.
If a PMS code is not entered, surveys will be triggered to send for all appointments, except for any appointment with other exclusions added (see below). For practices using AVImark, Cornerstone, and Impromed, surveys will not be sent if there is an open invoice associated with the appointment. Once the invoice is closed, the survey will be sent. For all other practice management softwares, the survey will be sent regardless of the invoice status.
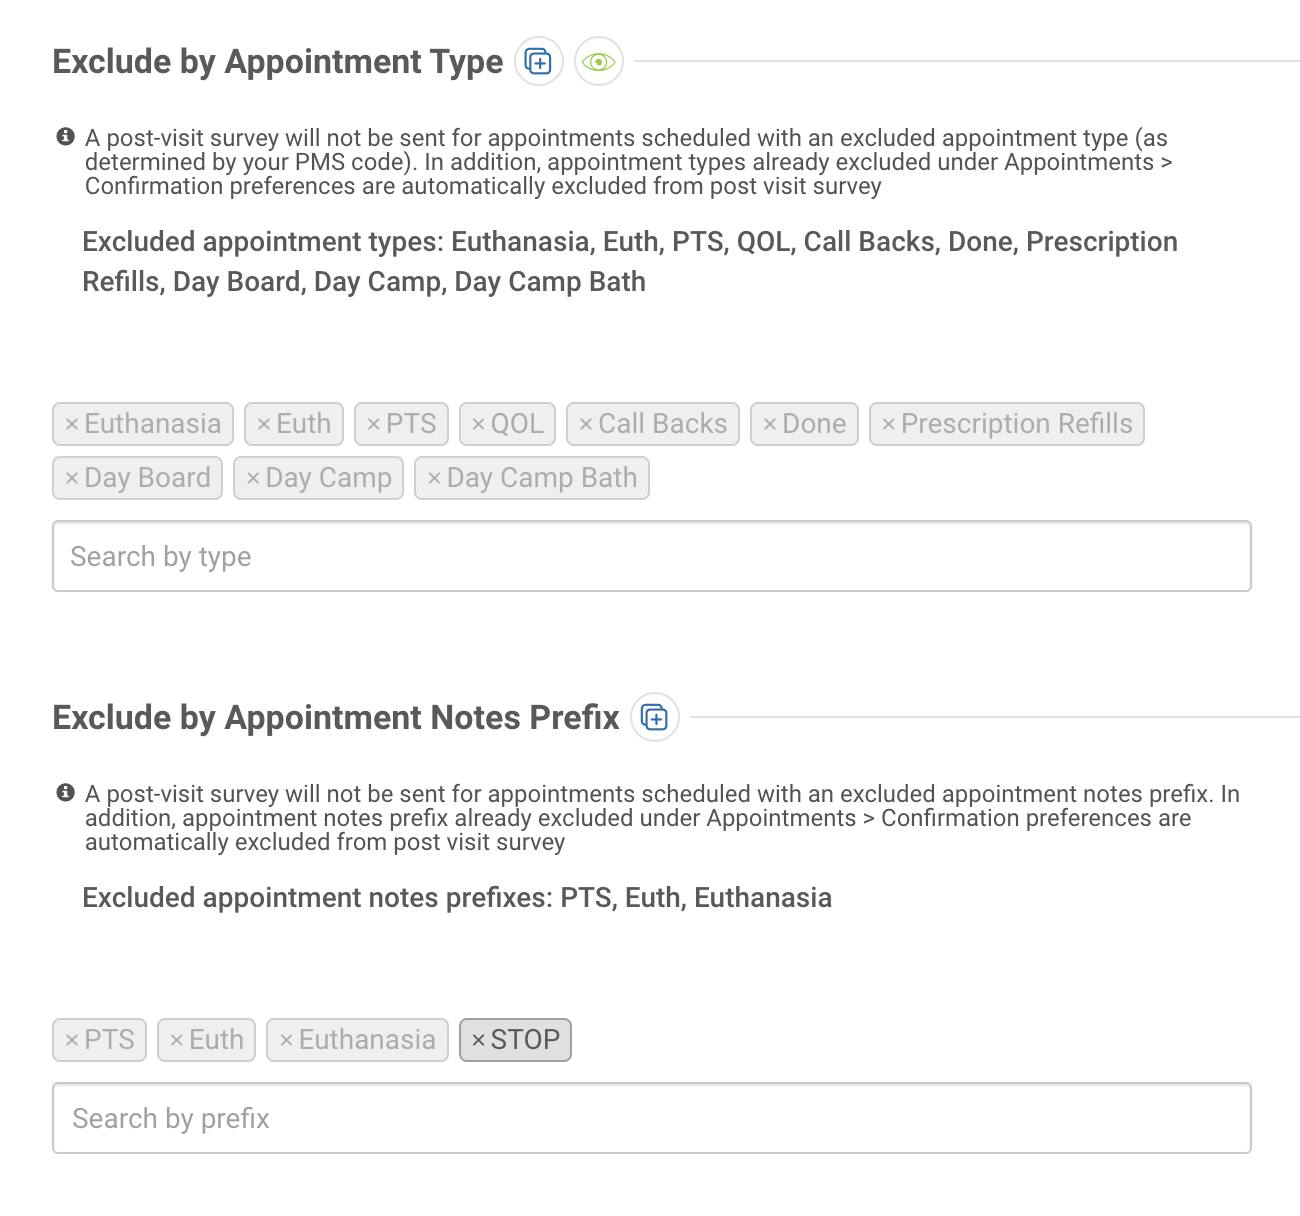
Survey exclusion by appointment reason/type/notes prefix:
A survey will not be sent if the appointment is scheduled in your PMS with any criteria that is already excluded under Settings > Appointment Confirmation Preferences, such as exclusions by reason/type, status, or notes prefix. To exclude additional appointment reason/types from receiving a survey request, search for and select the reason/type code in the search bar.
For example,
If euthanasias are excluded under appointment confirmations, post-visit survey requests will also be automatically excluded.
- If anal glad expressions are not excluded under appointment confirmations but are excluded under your post-visit survey setting, clients will receive an appointment confirmation for the anal gland expression appointment but will not receive a survey request.
Once you are ready to start sending post-visit surveys, toggle on the switch to Enable Post-Visit Surveys at the top of the Preferences page. This will display the Post-Visit Surveys tab in the dashboard menu, and surveys will begin to be sent within 1-2 days.