Accepting Virtual Payments Through the App
 Updated
Accepting virtual payments in a veterinary practice offers several benefits for both the clinic and its clients. With the rise of e-commerce and digital-first services, clients increasingly expect the ability to pay online or through mobile devices. Meeting this demand helps your practice stay relevant.
Here are some key advantages:
- Convenience for Clients - Flexible Payment Options: Clients can pay through credit/debit cards making the process easier and faster.
- Enhanced Client Experience - Streamlined Checkout Process: Digital payments reduce wait times, especially during busy hours.
- Increased Revenue Opportunities - Telemedicine Services: Virtual payments support remote consultations, a growing trend in veterinary care.
How to apply:
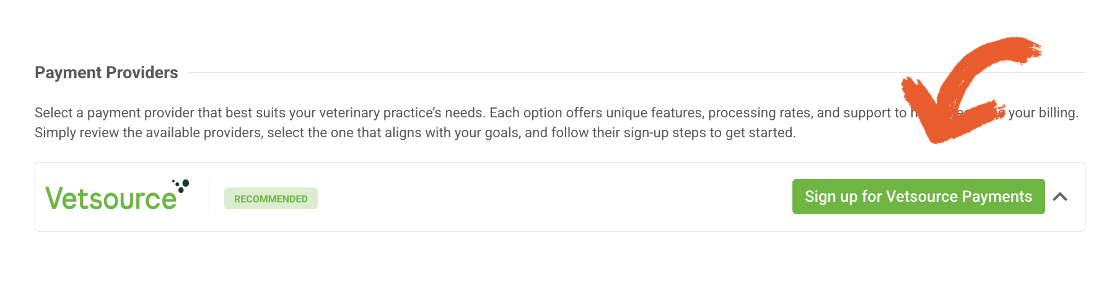
If you are interested in signing up for Virtual Payment, navigate to Settings > Virtual Payment on your Vet2Pet Dashboard. Click "Sign up for Vetsource Payments" and complete the form.
A member of our team will then email you the Vetsource Payments application. Once you're application has been approved, your Vet2Pet Success Coach will reach out.
How to set-up:
- Once your application with Vetsource Payments has been approved, enable Virtual Payment:
Settings > Virtual Payment > toggle on Enabled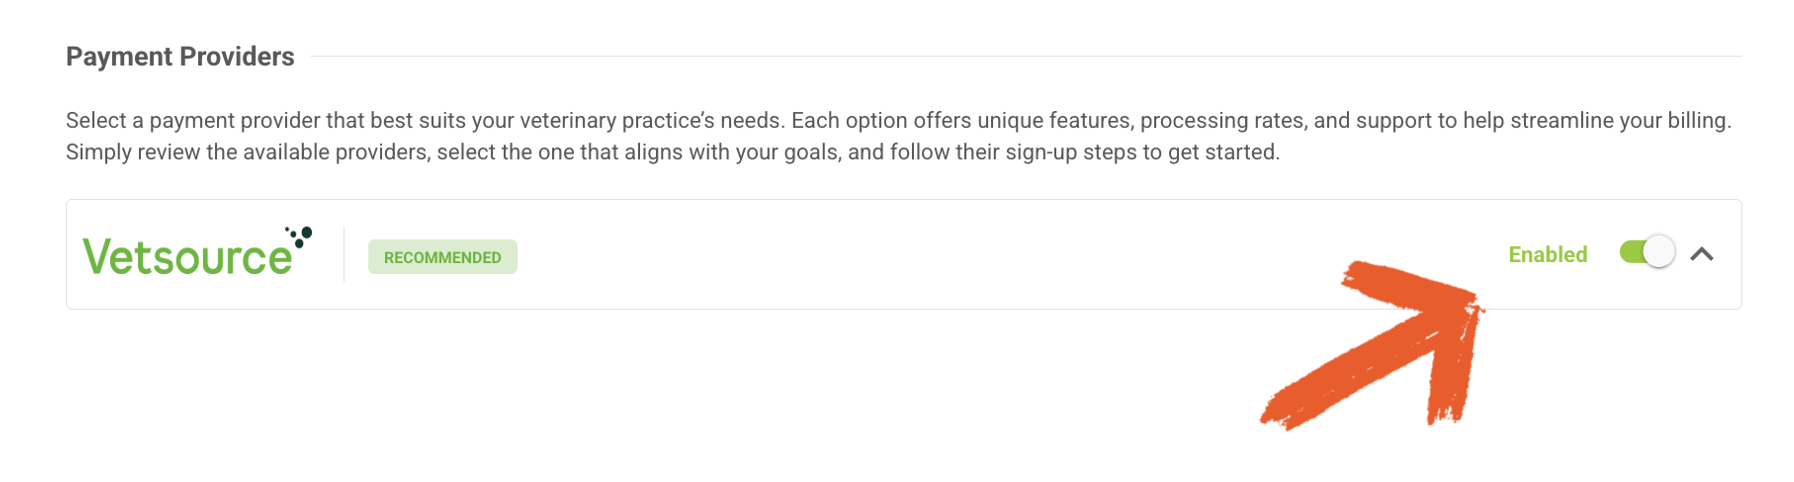
- Next, be sure to create an "App Payment" type within your PIMS. This will allow for quicker reconciliation of your transaction journals.
How to request and process a Virtual Payment through the Conversations feature:
Click below to learn by video 🎥
- Initiate an Conversation - Begin a secure, real-time conversation with the client through the Conversations feature by sending an App Chat or 2-way text. Ensure the conversation remains active during the payment process.
- Prepare the Invoice - Generate the service invoice within your PIMS and attach it in the conversation for your customer to review. Confirm that the total amount and details are accurate before sharing.
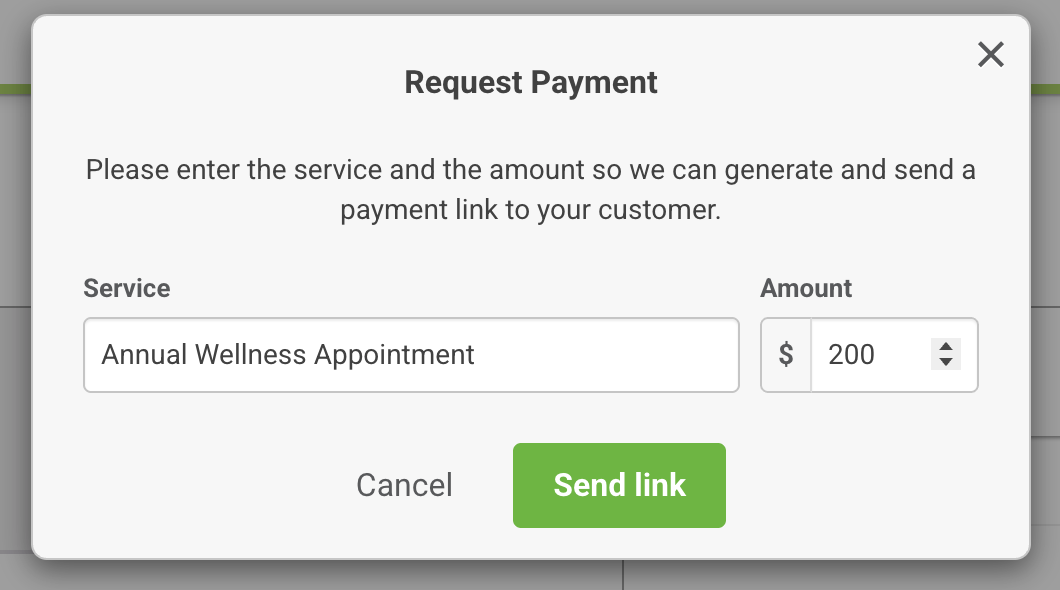
- Request Payment Securely - From within the active conversations in your practice dashboard, select the $ icon. Add the Service Title or Invoice Number matching your PIMS and the amount to be collected. Click Send Link.
- Confirm Payment Completion - For payment confirmation, monitor the dashboard. The conversation will display "The payment for <Service> for <Amount> is approved" in green text.
- Record the Payment - Apply the payment manually in your practice management software, and, if needed, send a PDF of the invoice to your client via Conversations. The collected payment will be deposited into the practice’s bank account with the agreed upon rates with Vetsource Payments.
- At the end of the day, access the virtual Vetsource Payments terminal to reconcile the incoming payments against the recorded invoices in your practice management software.
- You will also be able to see information about processed virtual payments in your practice dashboard under Reports > Payments.
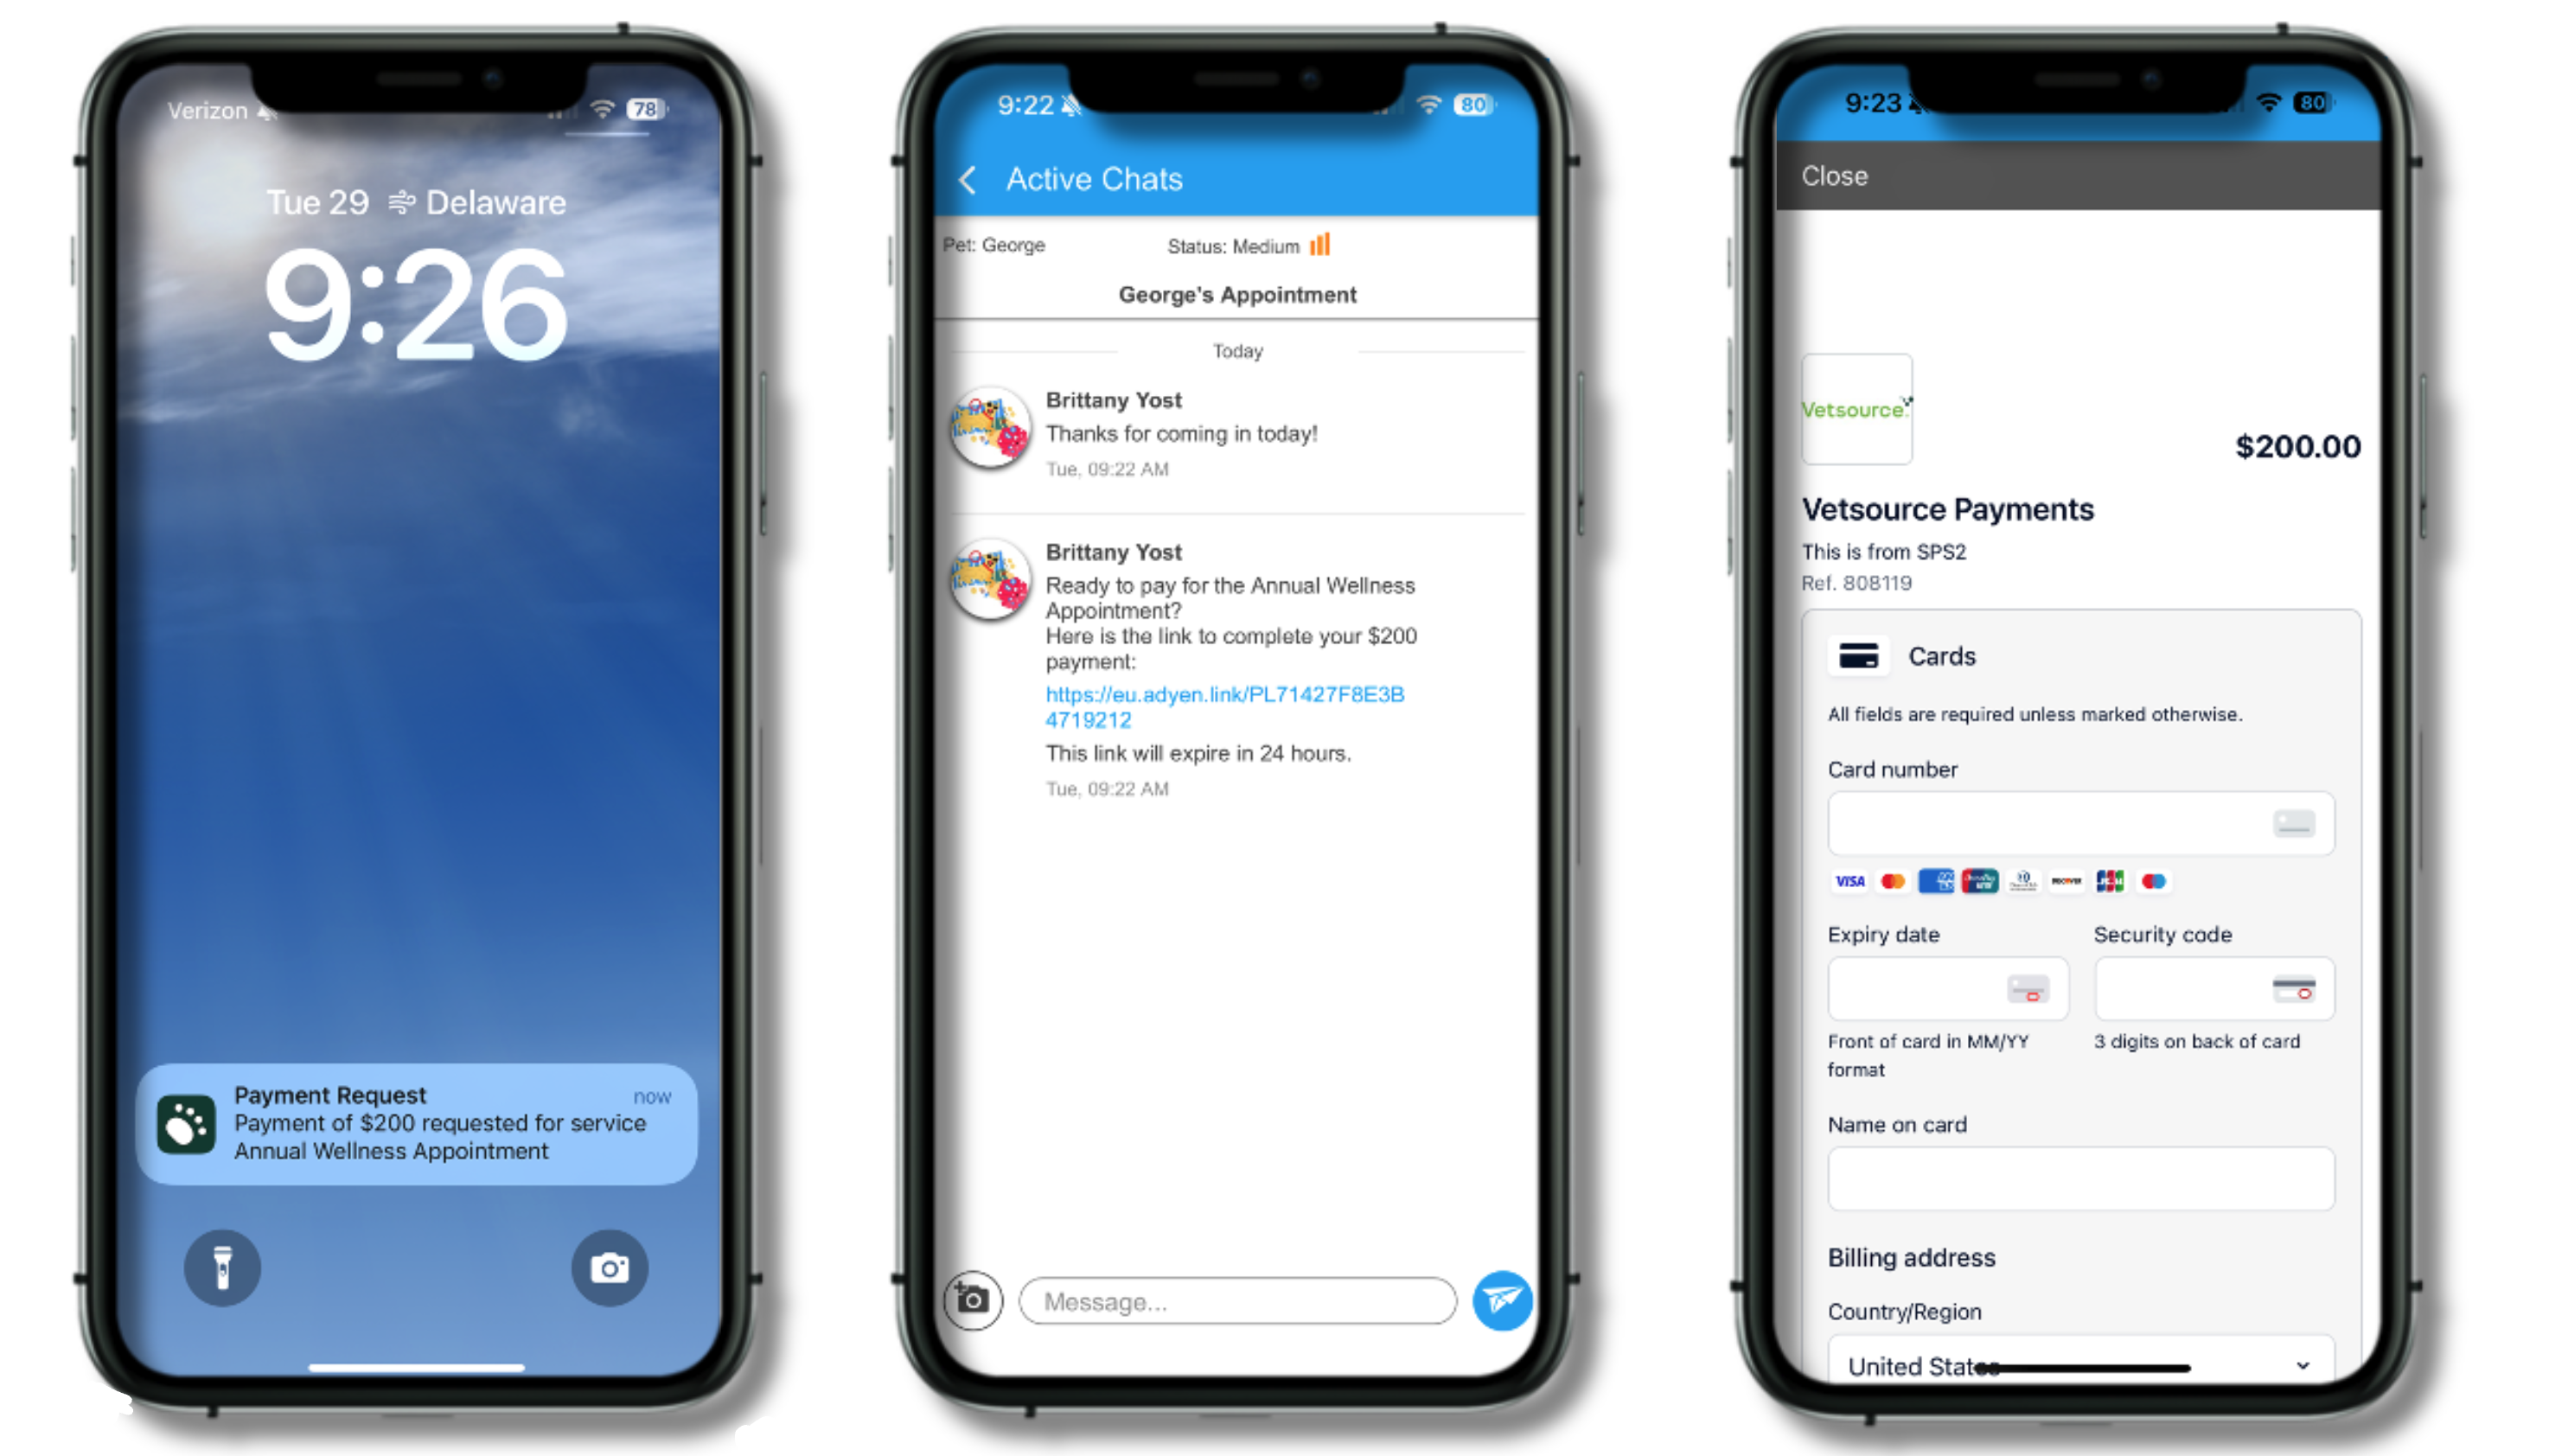
What does this look like to your app user?
When you send a payment request through App Chat, the client will receive a prompt to submit their payment both in a push notification and directly within the chat.
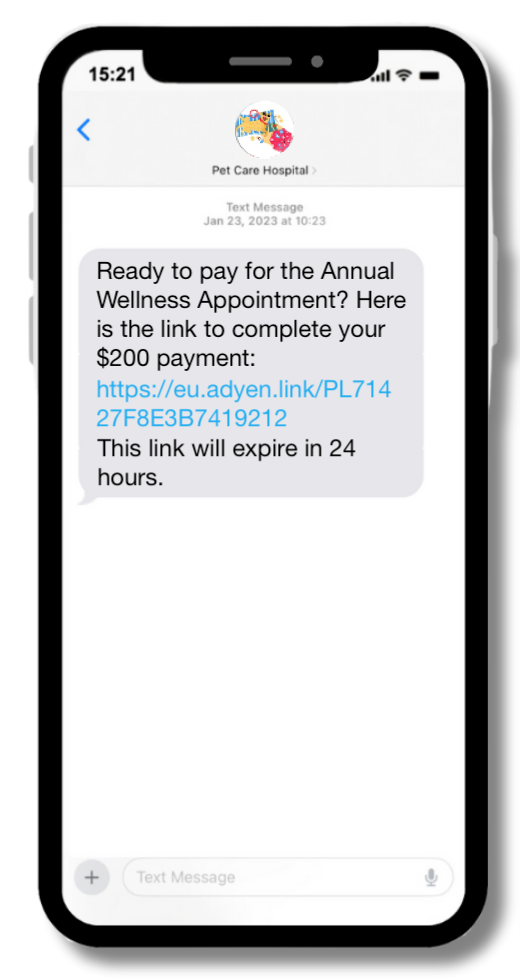
When you send a payment request via text, the client will receive a text message with a link to submit their payment.
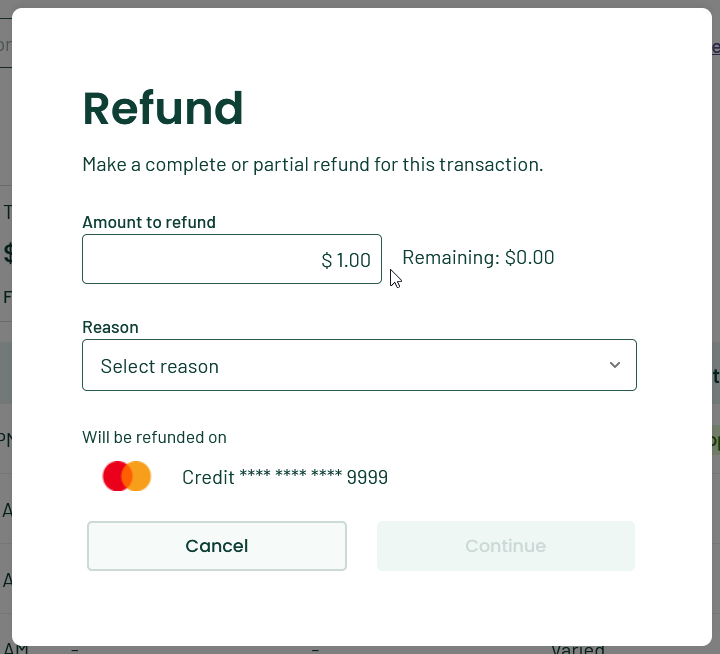
How to Process a Refund:
- To process a refund, log in to your Vetsource Payments dashboard. Select the 3 vertical dots to the right of the transaction line and choose Refund.
|  |
Once a transaction has been refunded, the Method will appear as Varied in the Transactions list. Select the arrow to the left of the transaction line to expand the payment operation.
Select the 3 vertical dots to the right of the Varied transaction line and select Download to retrieve a PDF copy of the payment and refunded transaction.
