Visit Tracker
 Updated
The COVID-19 pandemic forced many veterinary practices to implement a full curbside-service approach. Even as the world returns to normal, curbside offerings continue to be requested by clients. Visit Tracker was created to allow practices to operate using a hybrid model. Fully customizable, Visit Tracker can be used in many different ways to fit each practice's unique needs.
All kinds of businesses—from grocery stores to retail shopping centers and beyond—have made curbside services standard. There is no better time for your veterinary practice to adopt this, especially because your team is already familiar with the process. Visit Tracker will make seeing appointments a more efficient process, and allow your clients to request convenient curbside service for food and medication pick-ups, patient drop-offs and pick-ups, and more, which will elevate the client experience.
How Visit Tracker works
- Your client arrives at your hospital and pulls into the parking spot.
- There are several options for how clients can check in:
- Scan a QR code.
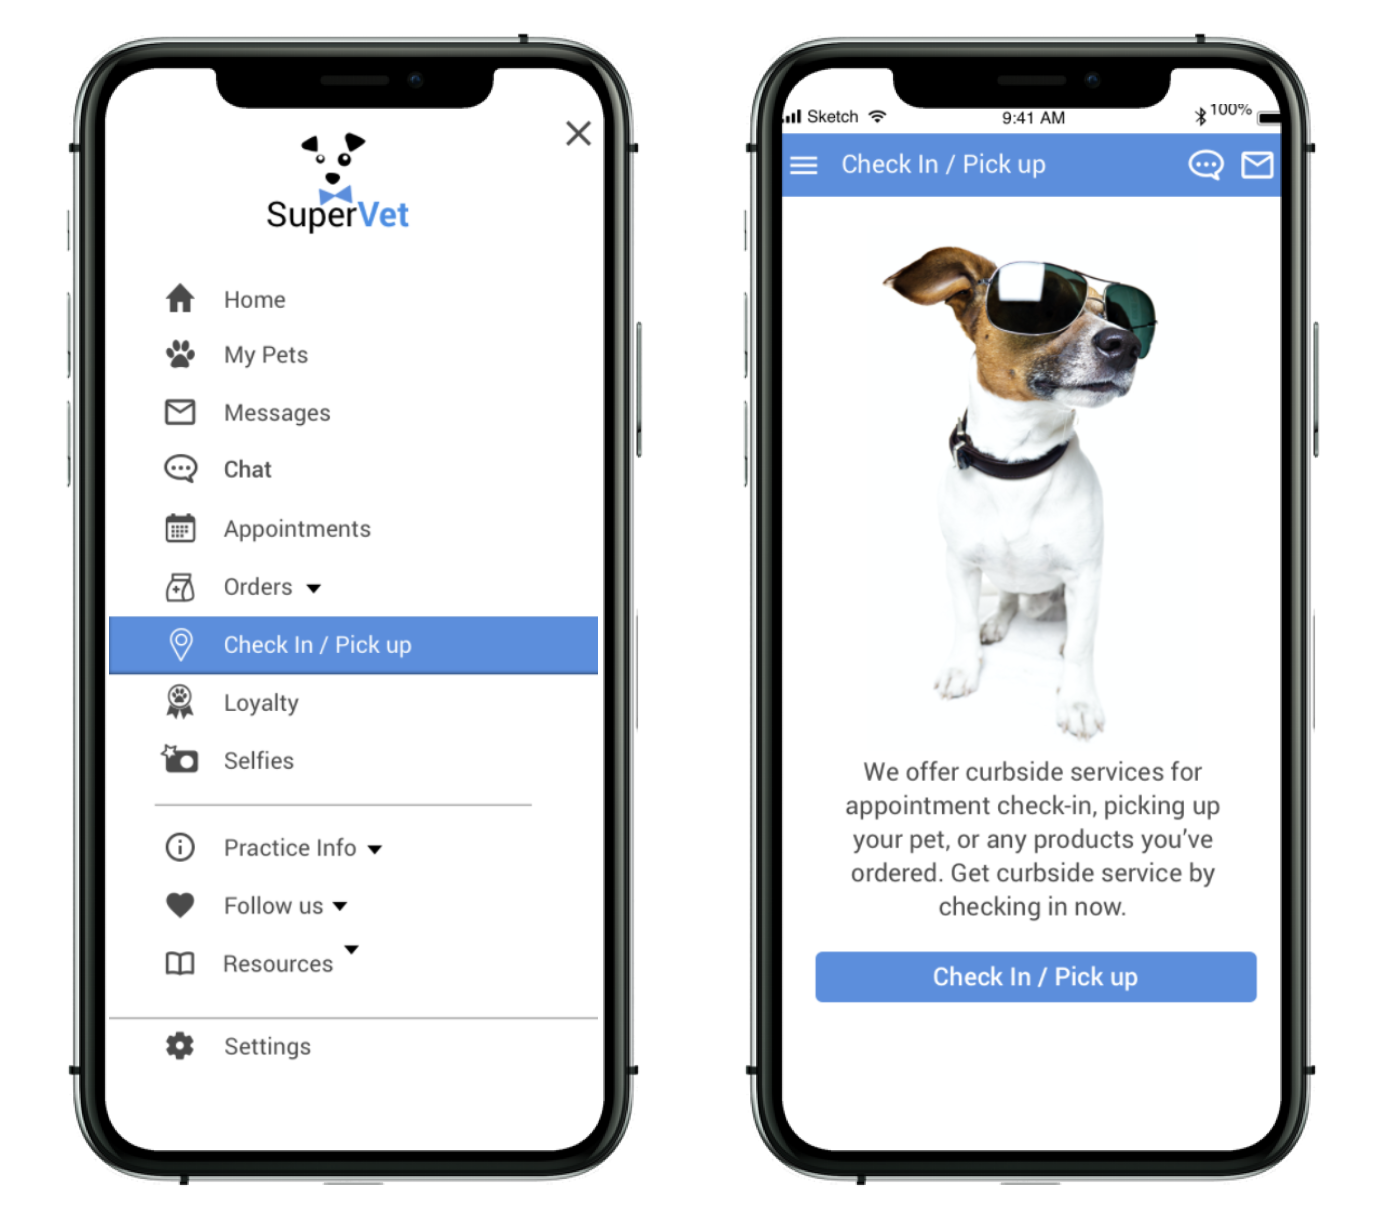
- Click the Check In / Pick Up option in the app sidebar menu.
- Click the link to the check-in form that can be delivered in an appointment confirmation message.
We recommend creating parking signs that will instruct your clients to check in via the mobile app, or by scanning the QR code for curbside service. A free Canva template is available HERE.

- When your client scans the QR code or clicks on the Check In / Pickup button in the mobile app sidebar menu, they will be sent to your customized check-in form. Once they complete the form, they will be prompted to download or open your app.
- The completed form arrives in your practice dashboard under the Visit Tracker tab. You can enable desktop alerts for an additional layer of awareness for incoming form submissions. The practice can also have an email notification sent when a completed form is submitted.
Dashboard features
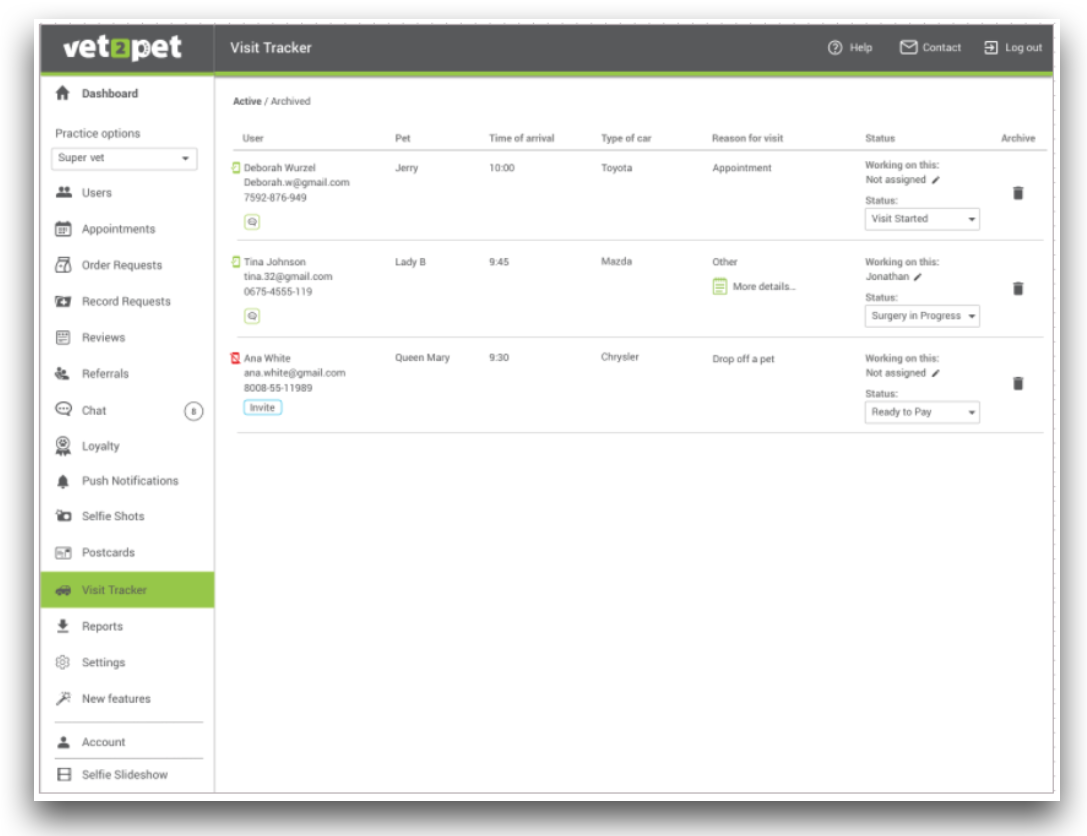
From the dashboard, your practice will quickly be able to see if a client is a current app user, and can invite the client to the app if they are not. A specific team member can be assigned to each visit, and the status of the appointment will be displayed for visibility to the entire team. If internal notes are needed, they can be added via the Note icon, which will turn the icon green.
If any additional information was submitted from the form, the More details icon will turn green, and the information can be displayed by hovering over the icon. Clicking Export details will generate a pdf file for use as a travel sheet or for attaching to the PMS medical record if desired.
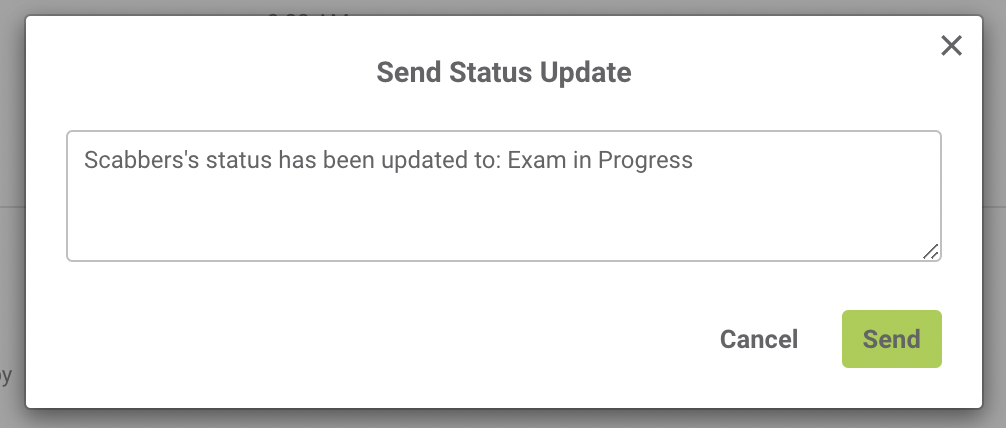
For clients who are app users, a prompt to send a push notification with an update will appear each time the visit status is updated in the dashboard.
Once the appointment is complete, the visit can be archived. It will be available for future reference through the filter settings, if needed.

Example of Visit Tracker set up for curbside services, with parking spot number indicator.
Example of Visit Tracker set up for curbside services, with vehicle type, when parking lot number indicators aren't available.
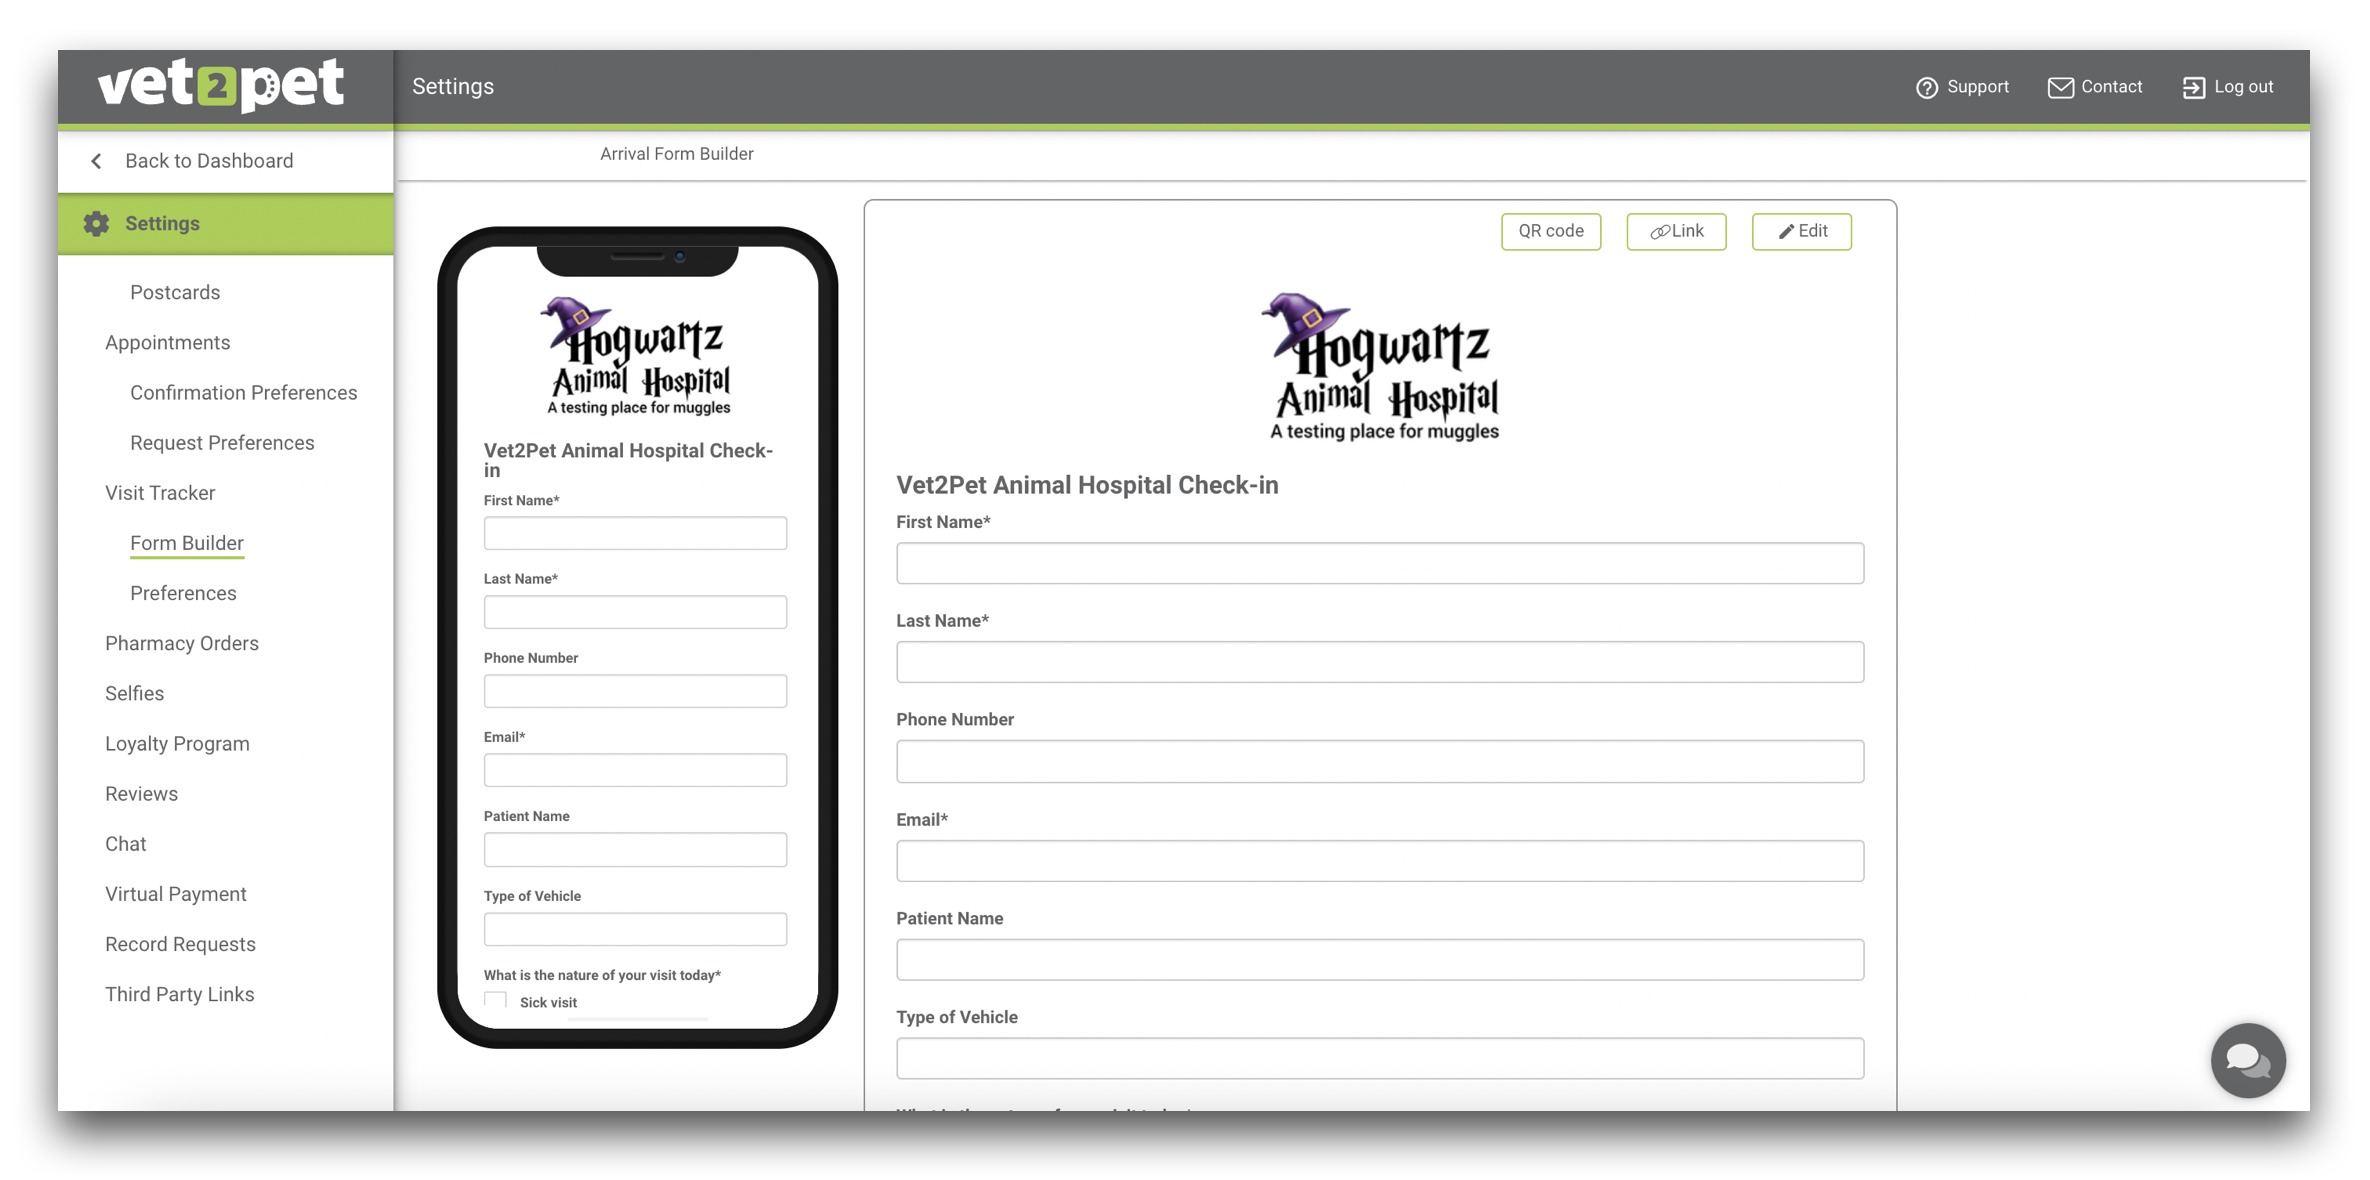
Setting up Visit Tracker
To create your customized arrival form, go to Settings > Visit Tracker > Form Builder. Simply drag and drop the form field type, update the text, and see a live preview of your form as your clients will see it on their mobile device. There is an option to exclude the parking spot/vehicle type question in the Preferences tab.
The form does not include logic for different scenarios at this time.
To customize the status options that can be utilized for each appointment, go to Settings > Visit Tracker > Preferences. A default list of status options is already created and can be modified to fit your practice's needs. Check the box to Send push notification to get a prompt to notify the client when the status is updated. For statuses used for internal purposes, keep this box unchecked.
To receive an email when a form submission is received, enable the switch to Email the practice when a Visit Tracker arrival form is received. If the switch is enabled, the email will be sent to the address entered under Settings > Practice Info > Primary Email. To have the email notification sent to a different address, enter it in the space provided.
To hide the parking spot number or vehicle type form field, enable the switch to Exclude parking spot field.
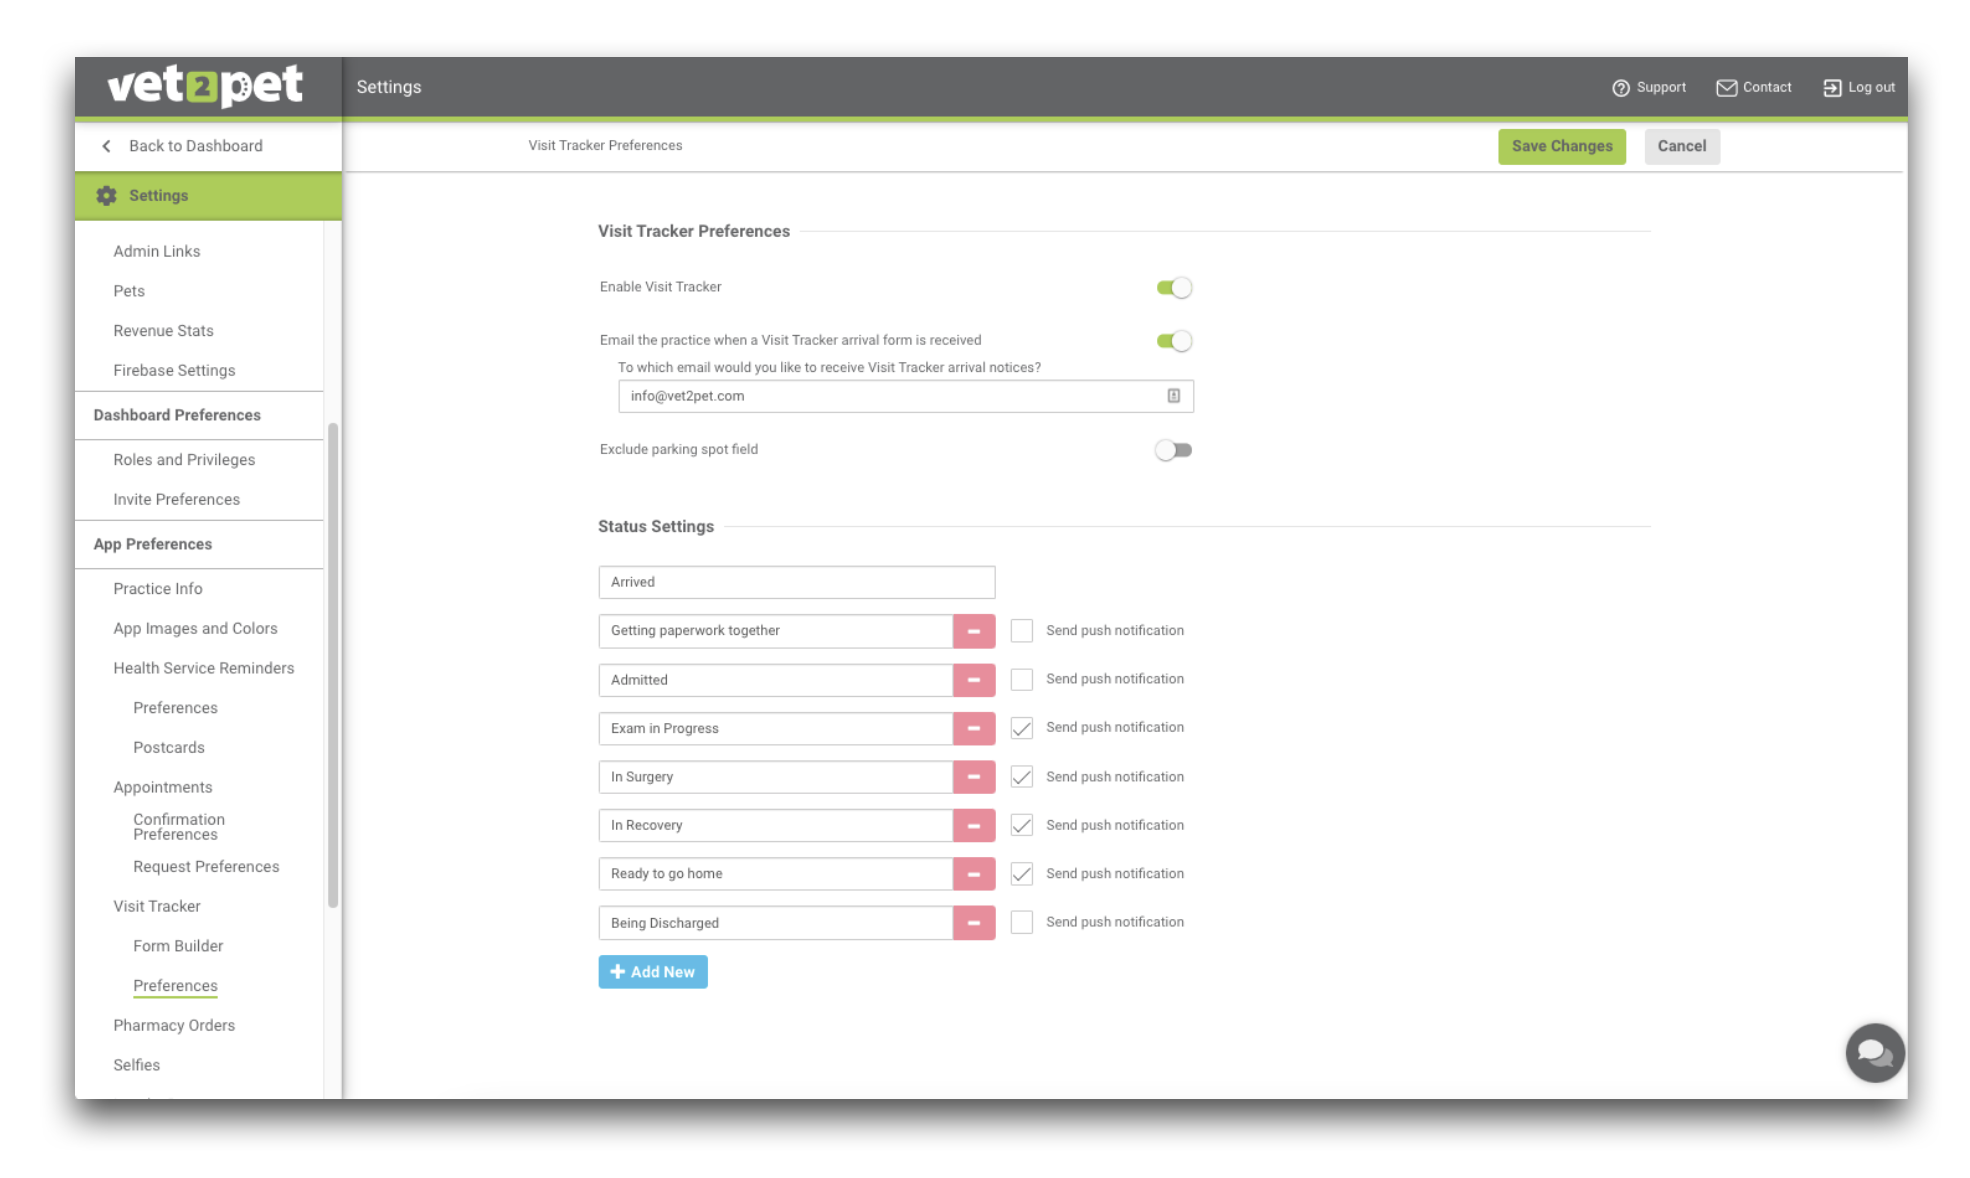
Once you are ready to start using Visit Tracker, toggle on the switch to Enable Visit Tracker. This will display the Visit Tracker tab in the dashboard menu and the Check In / Pickup button in the mobile app.